REVIEW · SYDNEY
Sydney Photography Masterclass – Private Photography Lesson
Book on Viator →Operated by Aperture Tours · Bookable on Viator
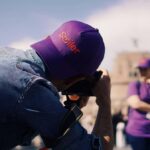
Streetlights, cameras, and a plan. That’s the vibe here: a private night photography lesson built around real Sydney photo spots, so you’re not just standing around hoping for a great shot. I like that it’s private (up to four people) and you can go wherever your guide thinks the light will cooperate, and I also like the hands-on teaching style—camera basics, framing choices, then night techniques put straight into practice. One thing to consider: you need to bring your own camera, and a tripod isn’t included (though you can rent one), so go in prepared.
The core lesson is the exposure triangle—aperture, ISO, and shutter speed—but the payoff is how quickly you learn the tradeoffs in real scenes. I also like that you’ll get time for photo review, so your next steps are clear instead of vague. A possible drawback is simple: three hours goes fast, especially once you’re seeing better compositions and suddenly noticing every light source.
If you want a structured way to shoot Sydney at night without guessing, this masterclass is a practical match. And because it’s guided with a local photographer feel (Glenn is mentioned in past sessions), you’ll spend more time shooting and less time Googling settings mid-walk.
In This Review
- Key takeaways before you go
- A private 3-hour photo coach in Sydney (and why it matters)
- Who this fits best
- What you learn: aperture, ISO, shutter speed, and better framing
- Gear reality check: camera, tripod, and what to bring
- Milsons Point and McMahons Point: starting with harbour light and clean angles
- A practical drawback
- Luna Park to the Harbour Bridge: shooting big, bright subjects without getting fooled
- The real win
- Hickson Road Reserve and the Opera House: training your eye for light balance
- What’s the drawback?
- Cahill Expressway and Mrs Macquarie’s Chair: turning viewpoints into better compositions
- Consideration
- The Rocks and Circular Quay: backstreets discipline and the payoff at the end
- Price and value: what you’re really paying for
- The Glenn effect: tailored feedback instead of one-size instruction
- How to get better during the 3-hour session (not just after)
- Should you book this Sydney Photography Masterclass?
- FAQ
- Do I need my own camera?
- Is a tripod included?
- How long is the session?
- What group size is this?
- Where do I meet the guide?
- What will we learn during the lesson?
- What is the cancellation policy?
Key takeaways before you go
- Private route control for up to four people, so you’re not stuck with a rigid group pace
- Exposure triangle training with real-world examples and tradeoffs you can use immediately
- Night photography focus: where to stand, what settings tend to work, and how to manage the bright-dark mix
- Framing discipline: what to include, what to cut, and how to make landmarks feel intentional
- Photo review time to tighten your results before the session ends
A private 3-hour photo coach in Sydney (and why it matters)
Sydney can look like a postcard at night. The problem is that your camera doesn’t know that. This masterclass is built to close the gap between what you see with your eyes and what your camera records.
You get a professional photographer guide plus a local guide. That combination matters. The photographer part is about settings and technique. The local part is about knowing where the best angles are and how to move efficiently between them. With a private setup for your group, you can also ask questions in the moment—no waiting for a big crowd to finish.
The value isn’t only in the places you visit. It’s in the rhythm: shoot, get feedback, adjust, shoot again. That makes the lesson feel like a skill-building session, not a sightseeing checklist.
You can also read our reviews of more private tours in Sydney

Who this fits best
This works especially well if you’re:
- new to manual mode or want more control
- comfortable shooting but unsure how to handle night scenes
- the kind of person who likes to learn by doing, not by theory alone
It can also help more experienced photographers because you’ll still get time to refine framing and think through exposure choices under real street lighting and harbour brightness.
What you learn: aperture, ISO, shutter speed, and better framing
The teaching plan is straightforward, but the effect is practical. You start by understanding your camera’s main controls: aperture, ISO, and shutter speed. Then the lesson turns into real decisions.
Here’s what that usually changes for your photos:
- You learn how aperture affects the look (depth and separation), not just what the numbers mean.
- You learn how ISO affects brightness and noise, especially when the scene is a mix of dark areas and bright lights.
- You learn how shutter speed affects blur versus crispness, which becomes a big deal at night when you’re near moving water and bright edges.
Then you move into composition. The guide talks about:
- what belongs in the frame
- what distracts
- how to frame a landmark so it doesn’t look like a random postcard copy
I really like the focus on being in the right spot at the right time. Night photography isn’t only about settings. It’s also about angles, blocking, and timing your shot while the scene stays usable.
Finally, there’s photography tuition and a review of your images. That last part is where learning sticks. You leave with clearer reasons for what worked and what to try next.
Gear reality check: camera, tripod, and what to bring
This experience does not include a camera. It also says a tripod isn’t included, but you can rent one. So you’ll want to plan around that.
If you have a tripod, the night lesson becomes more flexible because you can slow shutter speeds and keep ISO under control. If you don’t, you can still learn a lot—but you’ll likely rely more on steadier holding and faster shutters, which means exposure decisions become more constrained.
For this kind of masterclass, bring:
- your camera and the lenses you actually use
- any basics you’re comfortable with (strap, spare battery, memory cards)
- whatever you’ve struggled with lately (focus issues, blurry shots, blown highlights)
The guide can’t fix your gear if you don’t bring it, so this is one of those tours where being prepared really pays off.
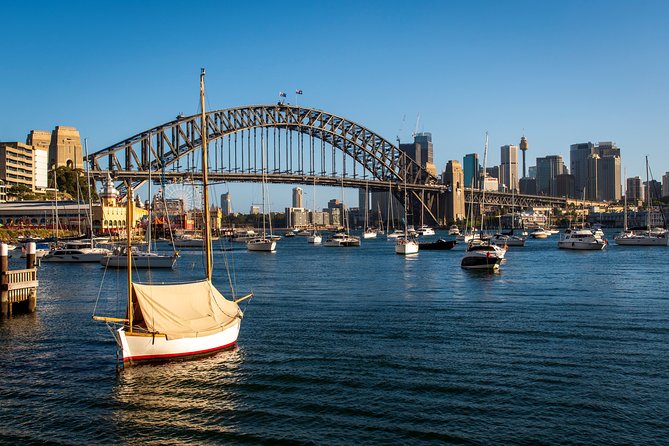
Milsons Point and McMahons Point: starting with harbour light and clean angles
You begin at 41 Broughton St, Kirribilli, and the early part of the walk is about setting your visual baseline. Starting around Milsons Point and McMahons Point is a smart move because you’re facing harbour scenes with strong leading lines and bright points of reference.
What I like about this opening stretch is that it helps you get into the right mindset for night shooting:
- you learn how to read the light sources in front of you
- you practice framing before you hit the big landmarks
- you start testing exposure choices while the scene is still manageable
You can also read our reviews of more photography tours in Sydney
A practical drawback
Early locations can be windy and exposed, and night shots punish camera shake. If you’re planning to shoot handheld, keep that in mind and be ready to adjust your technique if your first attempts come out soft.
The good news: that’s exactly the kind of situation where guided correction works best. You can change a setting or a stance quickly instead of guessing.
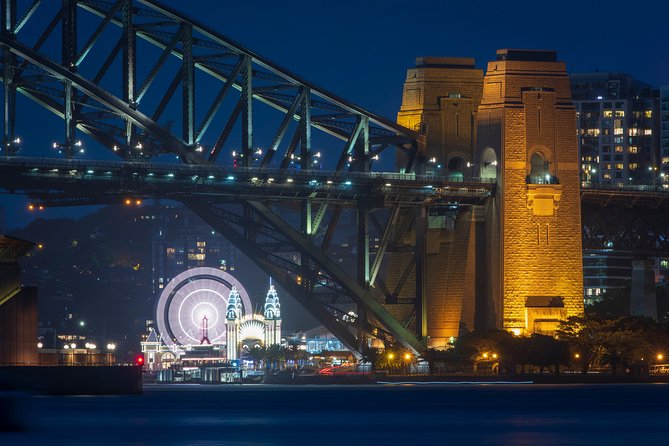
Luna Park to the Harbour Bridge: shooting big, bright subjects without getting fooled
Once you’re at Luna Park, the lighting gets lively fast. Bright signage and high-contrast edges can trick your camera into overexposure or messy highlights. This is a great place for the exposure triangle lesson to click.
Then you move toward Sydney Harbour Bridge, where the scale and geometry can tempt you to shoot everything at once. The guide pushes you to decide:
- do you want a wide establishing look or a tighter composition?
- do you want the Bridge to dominate, or do you want it to support the story of the harbour lights?
What you’ll practice here is managing the bright-dark mix. Night scenes often have:
- dark water or shadows
- bright building edges
- glowing reflections
The technique is less about memorizing a number and more about understanding the effect. That’s why the session spends time on tradeoffs. A slower shutter can capture light, but it may also magnify blur from movement. A higher ISO can brighten the scene, but it can bring noise.
The real win
You’ll start thinking in cause-and-effect, not just trial-and-error. That’s the difference between taking photos and building a repeatable approach.
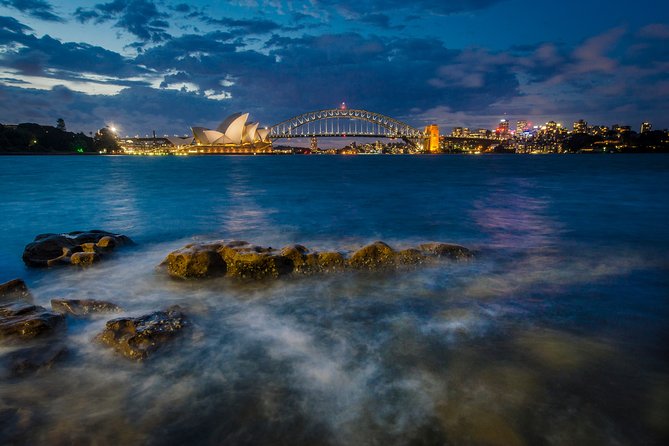
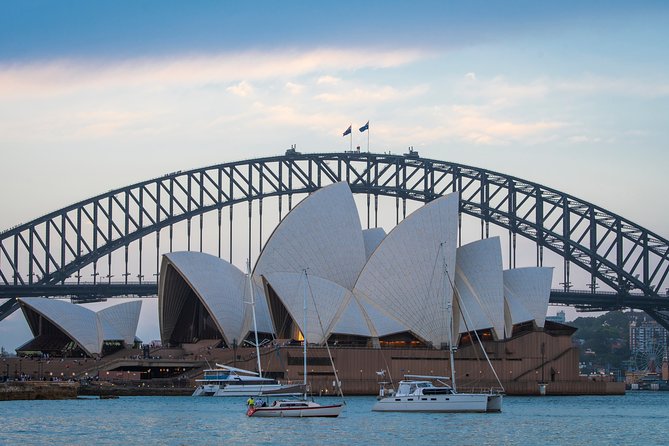
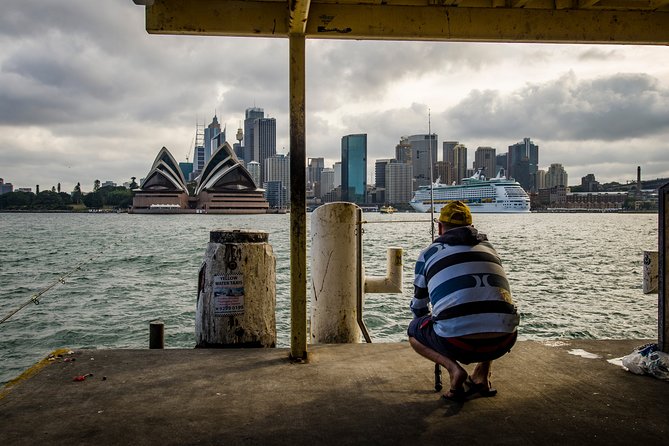
Hickson Road Reserve and the Opera House: training your eye for light balance
Hickson Road Reserve and the Sydney Opera House area bring you into the heart of iconic Sydney. The key is that the Opera House isn’t only a subject. It’s also a challenge: strong lighting, reflective surfaces, and details that vanish if your exposure is off.
This is where the framing lessons matter most. It’s easy to shoot the Opera House head-on and call it done. The guide’s approach pushes for more intention:
- align major elements cleanly
- watch for foreground distractions
- decide how much of the surrounding harbour scene should support the subject
At night, the Opera House also tests your highlight control. Bright edges can blow out quickly if your exposure is too aggressive. You’ll learn how to use aperture, ISO, and shutter speed to keep the image looking clean and not like everything is glowing.
What’s the drawback?
Landmark night shots can tempt you to rush. You might feel like you need to grab one perfect frame immediately. The lesson helps here, but you should still pace yourself and wait for the scene to settle—especially when boats or people move through the frame.
Cahill Expressway and Mrs Macquarie’s Chair: turning viewpoints into better compositions
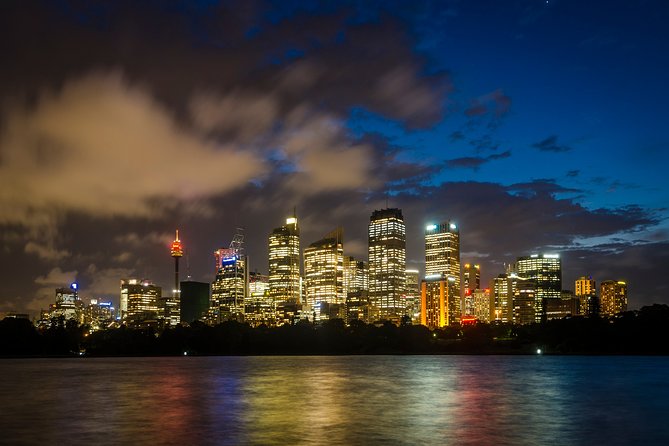
The route continues to Cahill Expressway and then to Mrs Macquarie’s Chair. This section is about changing your angle and learning how perspective affects your final image.
Mrs Macquarie’s Chair is a classic for a reason. From a viewpoint like that, you can create compositions where:
- the city lights become a pattern
- the harbour structure leads your eye
- the subject feels placed in the scene, not pasted onto it
What I like is the teaching emphasis on standing in the right place. In a lesson like this, that means you’re not only thinking about settings. You’re thinking about geometry.
Consideration
Viewpoints are great, but they can feel busy depending on timing. The practical skill you build is learning to work around what’s in front of you—find a better corner, adjust your framing, and keep shooting while you wait for gaps.
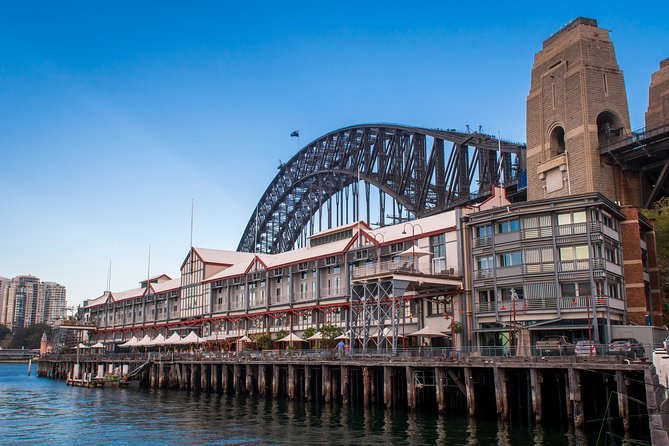
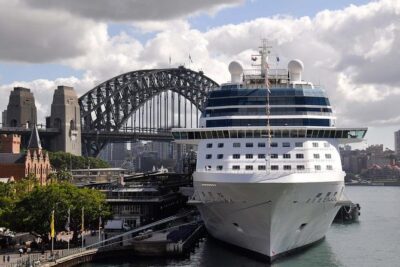
The Rocks and Circular Quay: backstreets discipline and the payoff at the end
Then you head into The Rocks, where the vibe changes from landmark scale to street-level texture. This is where the earlier framing lessons pay off. Night streets bring a different set of problems:
- mixed lighting
- smaller details that need sharper focus
- highlights that can overwhelm if your exposure is too hot
A good guide helps you notice texture: signs, stone surfaces, and small light reflections that can turn a simple street shot into something more intentional.
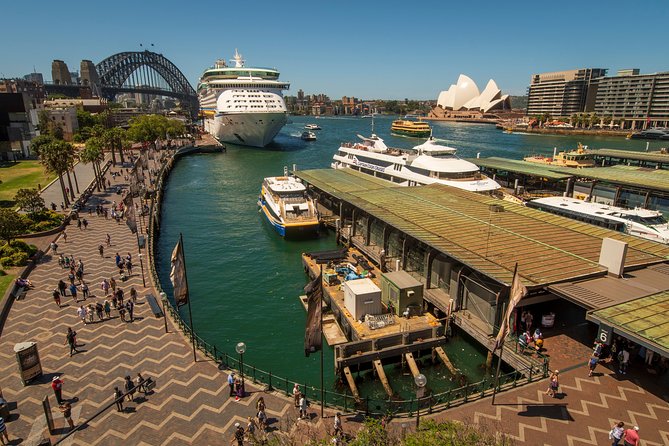
Finally, you finish at Circular Quay. That’s a strong place to wrap, because you can bring together what you learned:
- harbour light and reflections
- iconic elements in the distance
- city glow and moving elements in the foreground
And you’ll get that crucial end-of-session photo review. This matters because it turns your efforts into learning, not just memory cards full of similar shots.
Price and value: what you’re really paying for
At $186.48 per person for roughly three hours, the math makes sense only if you’re getting more than “a walk with a guide.” Here, you are.
You’re paying for:
- a private lesson for up to four people
- professional photography tuition
- a structured focus on night photography and framing
- time for photo review
That’s why the price feels fair compared to hiring a photographer for a generic session where you might not get the teaching part. If you leave with a stronger method—especially with manual mode and night settings—the cost becomes easier to justify.
Also, there’s a practical discount angle: group discounts are mentioned, and because the group is small, you can often benefit from sharing the session’s instruction time.
A small planning note: the average booking time is about 49 days in advance, which tells me this sells out in popular windows. If you’re traveling in peak periods, you’ll want to lock it in early.
The Glenn effect: tailored feedback instead of one-size instruction
One theme that stands out in prior sessions is that the instruction gets aimed at the group’s ability level. Glenn is specifically mentioned as someone who adjusted the session so two people with different skill levels could both benefit.
That’s a huge deal for a private class. If one person is still learning the exposure triangle while another is already tweaking composition, the lesson needs to handle both. In a good masterclass, you don’t slow down to teach the basics to everyone. You teach each person at their speed while keeping the session moving.
If you’ve ever had a tour where the guide talks at one pitch, you’ll feel the difference here.
How to get better during the 3-hour session (not just after)
To make this masterclass worth it, come ready to shoot, not just to watch.
Here are a few ways to use the time well:
- Ask one clear question early: what setting is hurting your photos most right now?
- Take a few “tests” quickly. Night scenes reward fast experimentation more than slow wandering.
- When the guide suggests a framing change, try it immediately. One adjustment at a time is how you learn cause-and-effect.
- Pay attention to highlight control. Night images often fail because bright lights dominate the frame.
The session ends back at the meeting point, so the lesson is concentrated. You’ll get the most out of it if you treat it like a training block.
Should you book this Sydney Photography Masterclass?
Book it if:
- you want a structured night photography lesson in Sydney’s most photogenic areas
- you want real feedback and a photo review, not just directions
- you like shooting with a plan: exposure triangle, framing, then applying it at each stop
- you’re traveling with one friend or a small group (up to four), where private instruction matters
Skip it (or consider alternatives) if:
- you’re hoping for a casual sightseeing stroll with no technical focus
- you don’t have a camera ready to use (since none is provided)
- you can’t or won’t consider renting a tripod if you want slower-shutter night shots
If your goal is to come home with sharper night photos and a repeatable approach, this is one of the most efficient ways to get it. You’ll leave with better instincts for where to stand, how to frame, and how your settings change the outcome.
FAQ
Do I need my own camera?
Yes. A camera isn’t included in the experience, so you’ll need to bring your own.
Is a tripod included?
A tripod is not included. The experience notes that you can rent a tripod.
How long is the session?
It runs for about 3 hours.
What group size is this?
It’s private. Your group can be up to four people total.
Where do I meet the guide?
The meeting point is 41 Broughton St, Kirribilli NSW 2061, Australia, and the activity ends back at the meeting point.
What will we learn during the lesson?
You’ll cover understanding your camera (aperture, ISO, shutter speed), framing (what to include and exclude), night photography techniques, and how to stand in the right place at the right time, plus a review of your photography.
What is the cancellation policy?
You can cancel for a full refund if you cancel at least 24 hours in advance. If you cancel less than 24 hours before the start time, the amount paid isn’t refunded.
You Might Also Enjoy
More Photography Tours in Sydney
More Private Tours in Sydney

More Tour Reviews in Sydney
- Blue Mountains Small-Group Tour from Sydney with Scenic World,Sydney Zoo & Ferry
★ 5.0 · 3,709 reviews