REVIEW · SYDNEY
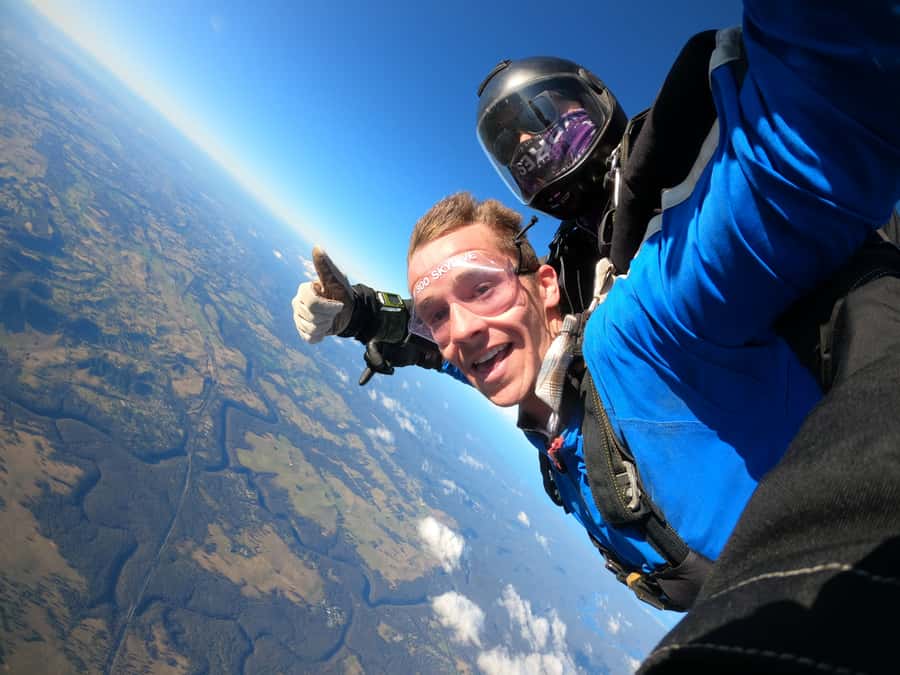
Sydney: Tandem Skydive with Optional Transfers
Book on GetYourGuide →Operated by SKYONE · Bookable on GetYourGuide
A tandem jump over Sydney hits different when you’re strapped to an instructor you can trust. This experience takes you up to 15,000 feet, then lets you feel real freefall at about 200 km/h with a pro behind you. I love that it’s built for first-timers: you get training, gear, and a clear safety routine, and the views can run from the Blue Mountains toward the coast. One thing to keep in mind is the weight limit and possible surcharge if you’re 95kg or higher.
My favorite part is how much time you spend before the exit getting briefed and settled, not just shoved out the door. A lot of people also love the plane ride up (20–25 minutes), because you get to see the route and the scenery shift before you even jump. The main drawback is simple: you’ll still need to deal with being outdoors in changing conditions, since it can be cooler at altitude and weather can affect the schedule.
If you want adrenaline with real structure, this is a strong option. You’re in English-speaking hands, the team is set up with its own airport/drop zone setup, and you’ll come down with a certificate to prove the leap.
In This Review
- Key highlights at a glance
- Tandem jump over Sydney, up to 15,000 feet
- Pick-up options and getting to the drop zone without stress
- Check-in, gear, and safety briefing that actually helps
- The 20–25 minute plane ride: when nerves usually turn into focus
- The exit and freefall: about 60 seconds at around 200 km/h
- Canopy ride to the ground and the certificate moment
- Price value: why $247 can be a solid deal (and what to budget)
- Weight limits, who it’s for, and who should skip it
- What to bring and how to prepare for a smooth jump day
- Rescheduling and weather reality (without the drama)
- Should you book this tandem jump in Sydney?
- FAQ
- How high do you jump from?
- How long does the experience take?
- Is there freefall, and how fast is it?
- Does the package include training and equipment?
- Is pickup and drop-off available?
- What should I wear and bring?
- What are the age and weight restrictions?
- What happens if weather prevents the jump?
Key highlights at a glance
- Up to 15,000 feet with a plane ride lasting 20–25 minutes
- About 60 seconds of freefall reaching roughly 200 km/h
- English-speaking instructors paired on a one-on-one tandem basis
- APF membership included, plus all training and required equipment (including goggles)
- On-site space for snacks and BBQ-style hang time, with barista-served coffee available
- Certificate after landing, so you walk away with proof you did it
Tandem jump over Sydney, up to 15,000 feet
This is a straightforward, high-impact experience: you’re going up by plane, then you’re jumping with an instructor attached behind you. The top altitude is up to 15,000 feet, which is high enough that Sydney and the surrounding coastline start to look like a map you can fly through. If you’re picturing sky-blue-and-cloud Instagram vibes, you’ll still get that, but the real magic is how the city, ridgelines, and water layers stack up as you climb.
You’re not expected to be athletic or trained. Your job is to show up, listen, and follow instructions when the moment arrives. After you land, you get a certificate, which is a nice touch if you’re the type who likes proof that the fear actually turned into action.
The experience is also paced. That matters, because the jump itself is only part of the story. A solid chunk of it is getting suited up, checked, and mentally set. On days when nerves hit, that structure helps.
You can also read our reviews of more tours and experiences in Sydney.


Pick-up options and getting to the drop zone without stress
There’s an option that includes pickup and drop-off, and the alternative is meeting at the building. Either way, the operation is designed around a real airport-style setup with an active drop zone. That tends to reduce the “where are we going, what time, and who knows what” feeling that you can get with some adventure tours.
If you pick the transfer option, aim to treat it like a real appointment. You’ll want to be ready on time so you don’t lose your slot when the aircraft lineup starts to tighten. The transfer side also appears to be a strong point, with 85% of reviewers giving it a perfect score, which usually means it’s orderly and on schedule.
My practical advice: if you’re staying somewhere farther from the airport area, transfers can be worth it just for the mental bandwidth. You don’t want your one big day to turn into a taxi scavenger hunt.
Check-in, gear, and safety briefing that actually helps
Once you arrive, you’ll check in and get assigned your flight number and instructor. Then it’s gear time: you’ll hand over your APF membership (it’s included in the price, so you don’t need to buy it separately), and you’ll get your equipment fitted. Goggles are included, and that’s important because at altitude you’ll want eye protection from wind and debris.
After you’re geared, you get a safety briefing. This isn’t just a formality. They explain what you should expect during the jump and how the tandem setup works so you don’t waste the first seconds panicking. Your instructor is the one managing the flight timing and the parachute deployment process; you’re there to experience it safely.
The instructor match matters too. People repeatedly highlight how instructors calm first-timers down and keep things professional and friendly. For example, reviews call out Phil, Hayley, John, Sarah, and others as legends with long sky experience. That kind of track record tends to show up in small habits: double-checking gear, explaining steps clearly, and staying patient with nerves.
The 20–25 minute plane ride: when nerves usually turn into focus
Your time in the air before the jump lasts about 20–25 minutes, and you’ll climb to up to 15,000 feet. This part is often underrated. It’s when your fear can either spike or settle.
Here’s what to expect: your harness is connected to your tandem instructor while you’re still inside the aircraft. You’ll get acquainted with how things feel, where you’ll be positioned, and what the view looks like from that height. Once you see the coastline and ridges from above, the jump stops feeling like an abstract fear and starts feeling like a real experience you’re about to do.
One practical note: it may feel cooler once you’re high up. Wear weather-appropriate clothing, and bring sunscreen because you’re likely to get exposed during boarding, gear fitting, and the flight.
I also recommend mentally timing your breathing during the climb. If you focus on steady inhale/exhale, you’ll reduce the panic spiral that can happen right before the exit.
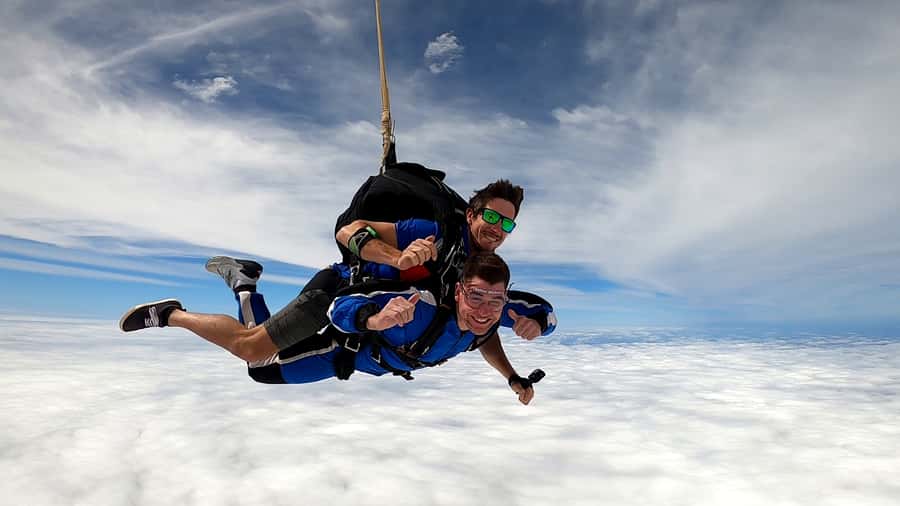
The exit and freefall: about 60 seconds at around 200 km/h
The main event is the exit and freefall. You’ll leave the plane and reach speeds up to roughly 200 km/h during about 60 seconds of freefall. That one-minute window is intense. It’s fast, loud, and physical, and your instructor is strapped to you for control and stability.
What I like about tandem is that you’re not doing anything technical. You’re not fighting wind direction or trying to steer. Your instructor is handling the jump, while you experience the body sensation of falling through the air at high speed.
To get the best experience, listen closely to what you’re told right before you go. The earlier briefings exist for this moment. If you take in the instructions and keep your attention on what your instructor says, you’ll spend the freefall reacting less and experiencing more.
After the freefall, you’ll move into the parachute phase for landing. That shift is usually a big relief, but in a different way: instead of raw speed, you get time to look around.
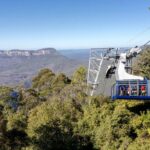
- Blue Mountains Small-Group Tour from Sydney with Scenic World,Sydney Zoo & Ferry
★ 5.0 · 3,709 reviews


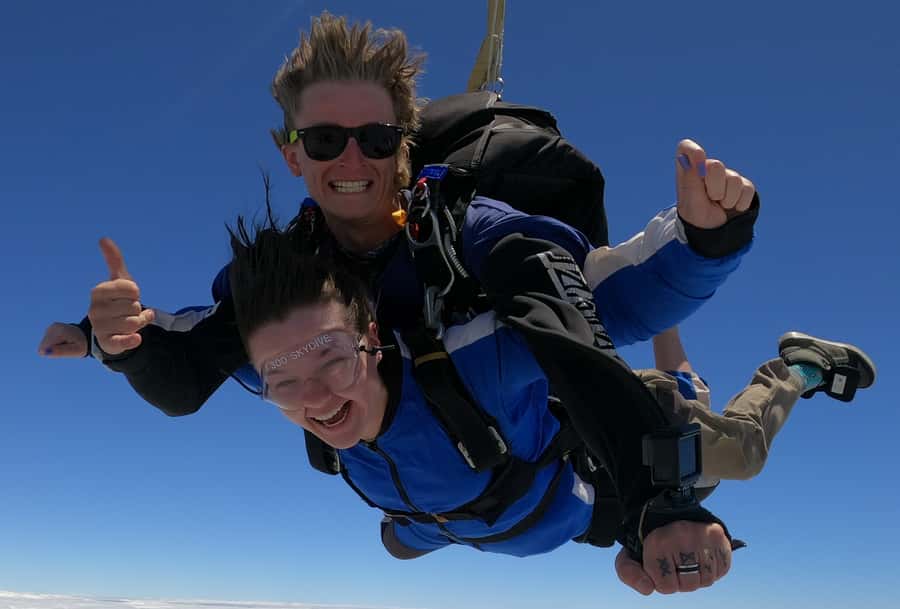
Canopy ride to the ground and the certificate moment
After the freefall, you’ll return to the ground under a parachute. The ride down is described as a stunning gentle ride, and it’s exactly what you want after the speed. You go from high-energy chaos to a more readable experience where you can scan the terrain and appreciate the scale of what you just did.
This is also when the adrenaline can start to loosen its grip. Many people feel a strong sense of achievement right after landing—partly because it’s so different from anything “normal” travel can give you.
Finally, you get a certificate. That might sound minor, but it’s a nice souvenir because it’s proof, not just a memory. If you’re collecting travel stories that you can later tell with specifics, you’ll have something to point to.
Price value: why $247 can be a solid deal (and what to budget)
At $247 per person for a tandem jump, you’re paying for a lot that many people assume is optional: training, all equipment (including goggles), tandem instruction, and APF membership included. The price also includes the experience itself and the core safety setup.
What’s not included is what you might want to plan around:
- Food and drinks
- Video and photo packages
That last line matters because you can easily spend more on souvenirs at the drop zone if you want a full package. If you’re cost-conscious, decide ahead of time whether you want media. If you’re value-focused, you can treat this like the one big purchase and keep everything else simple.
Also factor in the possibility of a pickup option. If you’re local, you can meet at the building. If you’re not, transfers can reduce stress and time cost, which is part of the real value of an experience like this.
If I’m helping you decide purely on value: this is strong because you’re not buying “just the jump.” You’re buying a guided, gear-supported, instructor-led event that’s designed to work for first-timers.
Weight limits, who it’s for, and who should skip it
This activity has clear limits:
- Maximum weight: 115 kg
- 95–99 kg surcharge: +$25
- 100–109 kg surcharge: +$50
- 110–115 kg surcharge: +$100
- Not suitable for children under 16
- Not suitable for pregnant women
- Not suitable for people over 254 lbs (115 kg)
So this isn’t a vague “some restrictions apply.” It’s measurable, and you should treat it seriously. If you’re close to the weight threshold, plan the math early so the day doesn’t turn into a cost shock.
Comfort and footwear matter too. Bring comfortable shoes and closed-toe shoes. No sandals or flip-flops. That sounds basic, but it’s the kind of rule that can ruin your morning if you show up unprepared.
Finally, remember your body and temperature: it can be cooler at high altitude. Wear something weather-sensible so you’re not shivering during the climb.
What to bring and how to prepare for a smooth jump day
For a stress-free day, pack like you’re going to be outside for a few hours and then making a quick, intense body experience happen right after.
Bring:
- Comfortable shoes (closed-toe)
- Sunscreen
- Weather-appropriate clothing
Avoid:
- Sandals or flip-flops
- Eating a huge meal right before (they recommend avoiding copious amounts)
Before you go, think about your day planning. You’ll be focused during check-in and briefing, so don’t schedule anything demanding immediately after landing. Plan for a buffer hour or two if you can, because your body will be buzzing even if you’re physically fine.
If you’re anxious, this is a good time to use your brain for one task at a time: keep it simple, follow staff direction, and trust your instructor’s experience. Several named instructors in the feedback are described as calm, funny, professional, and punctual, including Phil, Hayley, John, Sarah, Stefan, Yeongbin, Daniel, and Cyndi Louise. That pattern suggests the operation tends to handle nerves well when you’re doing your first jump.
Rescheduling and weather reality (without the drama)
Skies can change fast, and sky conditions can affect whether you jump at your booked time. If they can’t jump due to weather or unforeseen circumstances, they’ll reschedule you free of charge.
If you want to change your time for any reason, you need to give them at least 48 hours notice to reschedule without extra charges. Cancellations follow a time-based refund rule: cancel up to 24 hours in advance for a full refund, and cancellations within 48 hours of jump time carry a $100 per person fee.
My practical take: treat this like any outdoor adventure. You’re booking a day, not just a clock time. If you’re the type who hates uncertainty, consider building in flexibility on your travel itinerary. The “reserve now, pay later” option can help you hold the spot while you decide on dates.
Should you book this tandem jump in Sydney?
Yes, if your goal is a first-timer-friendly adrenaline hit with real structure. The price includes training, gear, goggles, and APF membership, and you’re guided by an instructor who stays in control of the experience. You also get the full reward: freefall at about 200 km/h, then a gentle parachute ride and a certificate to take home.
Skip it if you’re over the weight limit, under 16, pregnant, or you hate cold wind and being outdoors for a few hours before the jump. Also take the media cost seriously if you’re tight on budget since photo/video packages aren’t included.
If you want one Sydney activity that turns fear into a story you’ll tell for years, this one is hard to beat.
FAQ
How high do you jump from?
You can jump from up to 15,000 feet, depending on conditions and scheduling.
How long does the experience take?
The total duration is listed as 3 to 5 hours.
Is there freefall, and how fast is it?
Yes. You’ll do freefall for about 60 seconds, reaching speeds up to around 200 km/h.
Does the package include training and equipment?
Yes. You get training and all equipment you need, including goggles, along with APF membership.
Is pickup and drop-off available?
Pickup and drop-off are available if you choose that option. Otherwise, you meet at the building.
What should I wear and bring?
Bring comfortable shoes, sunscreen, and weather-appropriate clothing. Wear closed-toe shoes. Sandals or flip-flops aren’t allowed.
What are the age and weight restrictions?
It’s not suitable for children under 16 or for pregnant women. The maximum weight is 115 kg, and there are surcharges for riders 95 kg and above.
What happens if weather prevents the jump?
If you cannot jump due to weather or other unforeseen circumstances, they will reschedule your skydive free of charge.
You Might Also Enjoy

More Tour Reviews in Sydney
- Blue Mountains Small-Group Tour from Sydney with Scenic World,Sydney Zoo & Ferry
★ 5.0 · 3,709 reviews