REVIEW · BLUE MOUNTAINS
E-bike (electric) – Blue Mountains – Hanging Rock – SELF-GUIDED Hire Service
Book on Viator →Operated by Blue Mountains Biking Adventures · Bookable on Viator
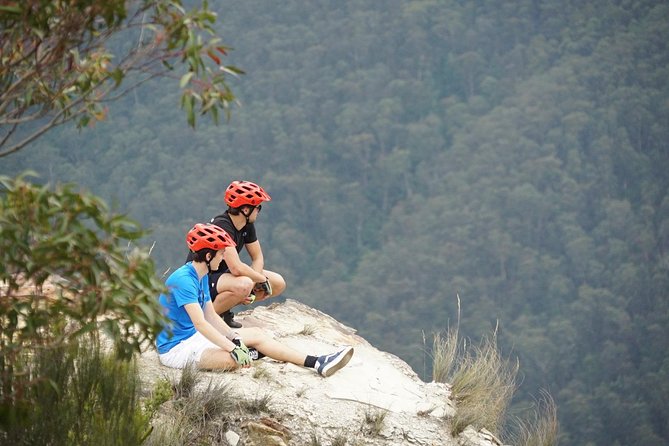
Two wheels, big Blue Mountains drama. From the moment you meet Sam in Blackheath, this self-guided e-bike hire is all about getting you rolling safely, with proper setup and safety gear that’s fitted on-site. I like the way Sam walks you through bike operation and trail basics before you head out on your own.
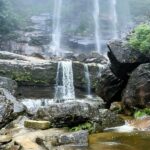
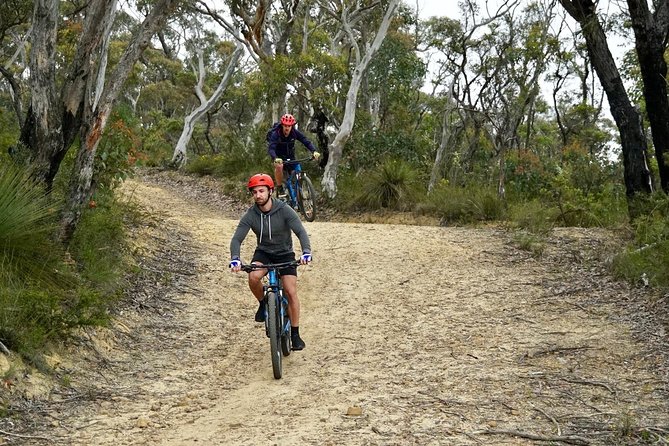
You’ll be on fluid dirt trails toward Baltzer Lookout and Hanging Rock in a UNESCO World Heritage wilderness. One thing to consider: the surface can be loose underfoot, so you’ll want grippy shoes and you should ride with extra care near the edges.
In This Review
- Key highlights at a glance
- Blue Mountains e-bike value: how this hire feels in real life
- Meeting Sam in Blackheath: your first 30–40 minutes matter
- Your bike: Merida e-MTB setup built for fire trails
- The self-guided route: ridgeline to Baltzer Lookout and Hanging Rock
- Ride direction and what you’ll notice along the way
- Baltzer Lookout: dramatic cliff-edge vibes
- Hanging Rock: the finish with loose footing
- Timing: expect about half a day (and why 3 hours is common)
- Included gear, extra costs, and the insurance reality
- Navigation and how to make self-guided feel easy
- What to bring and how to avoid common mistakes
- After the ride: Blackheath food and the next walk
- Who this Blue Mountains e-bike hire suits best
- Quick decision guide: should you book this ride?
- FAQ
- Is this experience fully self-guided?
- Where does the e-bike ride start?
- How long does the ride take?
- What time does the tour run?
- What e-bikes are used?
- Are helmets provided?
- Are gloves and basic bike gear included?
- Do I need to bring pedals?
- What should I wear or bring?
- What happens if the weather is bad?
Key highlights at a glance
- Sam’s on-the-day setup: helmet fit, bike checks, and practical skills before you ride
- Merida big 7/9 e-bikes: Shimano motor and battery built for Blue Mountains fire trails
- Self-guided but not confusing: out-and-back route means easier navigation with a map in hand
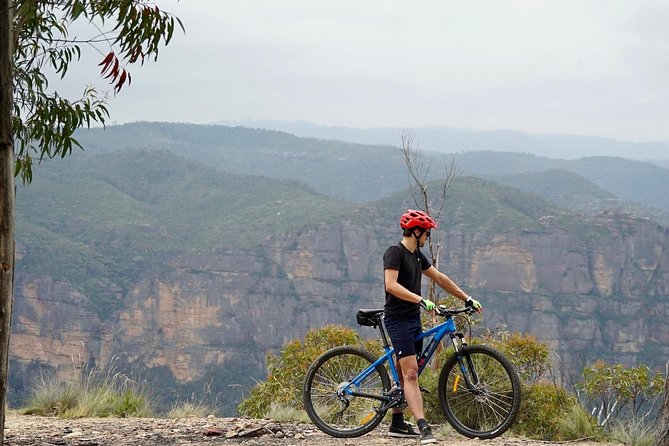
- Ridgeline views to Baltzer Lookout: dramatic lookout vibes with no fence separating you
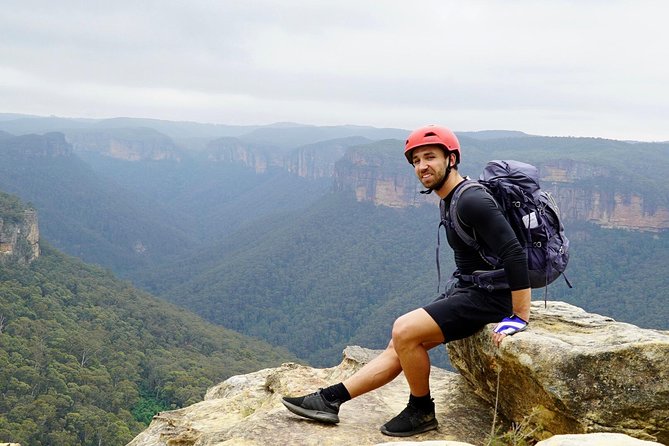
- Hanging Rock finish: jaw-dropping views and a wild-feeling cliff-edge moment
- Small-group capacity: maximum 15 travelers, with mobile service and minimum numbers to run
Blue Mountains e-bike value: how this hire feels in real life
If you like the idea of riding dirt trails but don’t want the hassle of hauling bikes, permits, or worrying about logistics all day, this is a very smart setup. You start in Blackheath, get a well-matched e-bike, then follow a clear out-and-back plan toward Baltzer Lookout and Hanging Rock. It’s the kind of activity that gives you both movement and payoff—fresh mountain air plus big views.
The price ($131.97 per person) makes the most sense when you look at what’s included. You’re not just renting a bike—you’re getting bike fitting, safety gear, and a 3–4 hour experience that’s paced for most riders. And because you’re on an e-bike, you’re more likely to actually enjoy the ride instead of arriving at the first climb already cooked.
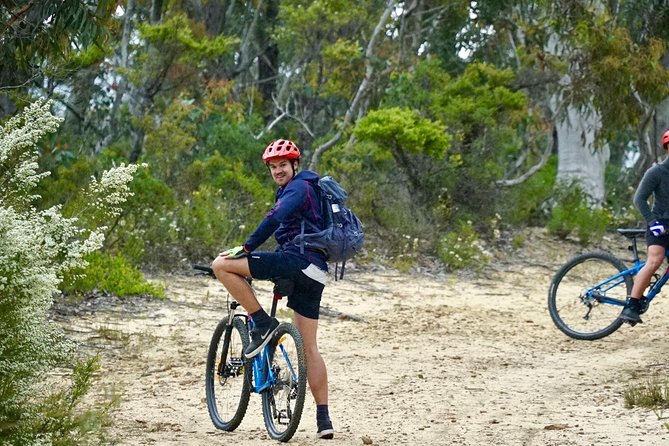
The ride is also positioned as friendly for different experience levels. The trails are described as fluid and suitable for experienced and less-experienced cyclists. That matters in the Blue Mountains, where “easy” on paper can still feel sketchy if you’re on the wrong tires or the wrong shoes.
You can also read our reviews of more cycling tours in Blue Mountains
Meeting Sam in Blackheath: your first 30–40 minutes matter
Your day starts with meeting Sam at the confirmed time and location in Blackheath NSW 2785 (the listed start time is 9:00 am). You’ll be working with the same person from hello to goodbye, which makes a big difference for comfort and confidence.
Plan on spending 30–40 minutes with Sam for:
- bike operation basics
- trail info
- practical skills and technical tips
- a proper helmet fit (they care about fit, not just wearing one)
This is where your experience either clicks or gets stressful. If you’ve never ridden an e-MTB before, the on-site instruction helps you understand how to handle the bike and how to think about the route. And if you have ridden before, it’s still useful—because a good setup can be the difference between enjoying the downhill-ish sections and white-knuckling them.
There’s also a key booking detail you should not ignore: you’re asked to include each rider’s height and gender when booking so the bike size can be allocated correctly. That’s not “nice to have.” It’s the difference between feeling planted and feeling awkward for the whole ride.
Your bike: Merida e-MTB setup built for fire trails
The bikes used are Merida big 7/9 mountain e-bikes, fitted with Shimano components, including the motor and battery. These aren’t generic e-scooters—they’re meant for dirt traction, varied footing, and the kind of stop-start climbing you get on Blue Mountains tracks.
A few practical notes I’d take seriously:
- You need the right shoe grip because parts near Baltzer Lookout and Hanging Rock are loose underfoot.
- Gloves are included in the hire, which is a small thing that helps with comfort and control on rougher patches.
- Spare bike essentials are also included: spare tube/pump/tyre lever hire. That means you’re not stuck guessing what to do if something goes wrong.
E-bike power also changes your decision-making. You still need to pedal and manage effort, but you can keep a steadier rhythm. That’s ideal for an out-and-back ride where you want to save energy for the views and the return.
The self-guided route: ridgeline to Baltzer Lookout and Hanging Rock
This is described as a typical out-and-back Blue Mountains ride. Translation: you follow a plan out to the main sights, then you turn around and return the same way (navigation is easier that way). You’ll get a map in hand before you set off, after the intro.
Ride direction and what you’ll notice along the way
You’ll ride along fire trails and follow the ridgeline toward:
- Baltzer Lookout
- Hanging Rock
The trails are described as fluid with a few short climbs. Those climbs are important to take seriously, because even with e-assist, you want to keep traction and avoid last-minute braking on loose surfaces. The “few short climbs” style is also why the ride works for less-experienced riders: it’s not a long grind that forces you to abandon the fun.
You can also read our reviews of more guided tours in Blue Mountains

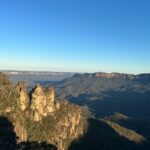

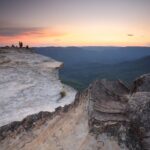
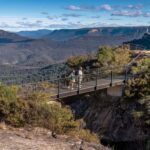
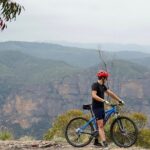
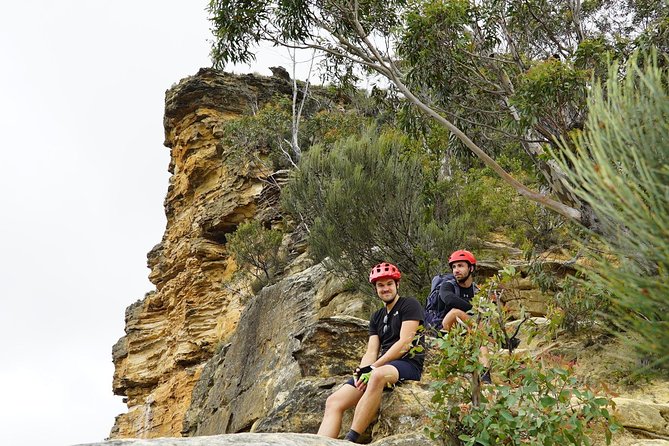
Baltzer Lookout: dramatic cliff-edge vibes
Baltzer Lookout is a highlight for a reason. Unlike some lookouts, there is no safety fence separating you from what can feel like the drop-off. That doesn’t mean it’s unsafe if you act smart—it means you’ll get a more open, raw view.
For most people, the biggest challenge here isn’t physics. It’s nerves. If heights get to you, go slow, keep your bike stable, and keep your full attention on where your tires are on uneven ground.
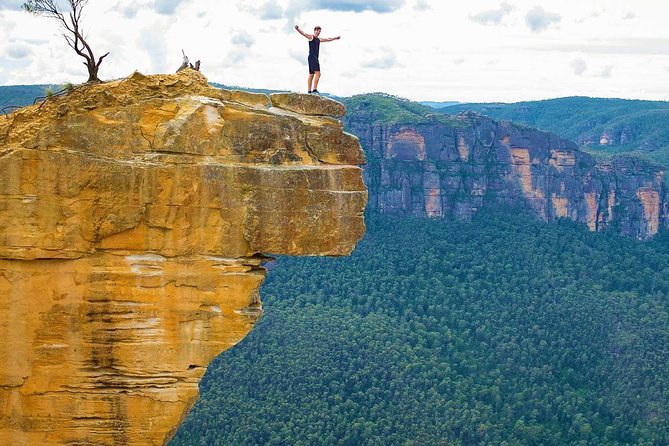
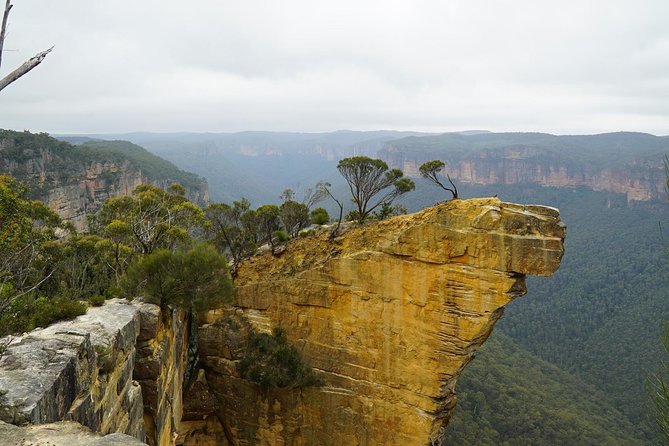
Hanging Rock: the finish with loose footing
Hanging Rock is where the experience turns from scenic to jaw-dropping. The underfoot can be loose, so you’ll want good grip shoes. I’d treat this part like a hike: pause often, move carefully, and don’t rush photos if the ground is shifting under you.
Timing: expect about half a day (and why 3 hours is common)
From hello to goodbye, you should expect 3–4 hours total. Sam’s intro and setup takes 30–40 minutes, then you ride.
You’ll likely complete the ride in around 3 hours. That average time is useful if you’re planning a morning, because it gives you options afterward in the same area of Blackheath.
Also note that start and finish times can vary to accommodate customers, and confirmation is done the night before with a phone call from Sam. That’s a nice touch for planning your day without guesswork.
Included gear, extra costs, and the insurance reality
Here’s what’s included:
- the bike (Merida big 7/9 e-MTB)
- accidental bike damage insurance (important: it does not cover electrical components)
- glove hire
- spare bike tube/pump/tyre lever hire
And here’s what can cost extra:
- SPD pedals can be hired on the day for $15 (so if you need clip-in pedals, budget for that)
- bike insurance for accidental damage can be purchased on the day for $30 (again, you’ll want to understand what’s covered, since electrical components are excluded from the included accidental damage insurance)
That insurance detail matters. E-bike riders often assume that “bike damage” means the full machine. But here, electrical components are specifically excluded from the included accident insurance. If you’re the type who gets nervous about falls, extra insurance might be worth it for peace of mind—but I’d decide based on how comfortable you are with riding on uneven, loose ground.
Navigation and how to make self-guided feel easy
Self-guided can sound intimidating. In this case, it’s softened by two factors:
- out-and-back route design (you’re not committing to a complicated loop)
- you start with trail info and a map
The key is to treat the intro as part of the experience, not just a formality. Watch what Sam shows you about bike controls and how to read the trail plan. Then, once you’re out there, ride at a pace that matches the conditions. If you’re moving fast for your skill level, loose sections can turn into a stress test quickly.
And because this is a mobile service with minimum numbers required to run, it’s worth staying flexible around your ride day. The owner is described as flexible and accommodating with special requests, but the bigger point is simple: reach out ahead of time if you can shift dates to help the tour run.
What to bring and how to avoid common mistakes
You’ll want to show up ready. The requirements include:
- a passport, licence, or acceptable form of identification
- an active credit card
They also highlight that Shoes are very important because parts are loose underfoot. That’s the most common “I didn’t think it mattered” issue with bike days that include rocky or dusty trail edges.
If you’re bringing your own pedals or you have specific equipment needs, tell Sam ahead of time. He’s described as flexible and accommodating, and he’ll try to help with special requests.
One more practical thought: you’ll be riding in the Blue Mountains, which means weather can change. This activity requires good weather, so you might be offered a different date or a full refund if it’s canceled due to poor weather.
After the ride: Blackheath food and the next walk
When you finish back at the meeting point, you’re in a good position to extend the day. The plan mentions checking out cafes in Blackheath Village.
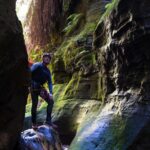
Then there’s a second option if you still have legs: the popular Grand Canyon walk from Blackheath. It’s described as a 2–3 hour hike with valley views across the Grose Valley and crisp mountain air. That’s a nice pairing if you want a bigger sightseeing day without adding more bike logistics.
Who this Blue Mountains e-bike hire suits best
This is a strong choice if you want:
- a well-run setup (bike fit, safety gear, helmet fit)
- an easier navigation structure (out-and-back)
- e-assist support to handle short climbs
- big viewpoints without committing to a full-day hard training ride
It’s also a good fit for people with moderate physical fitness. The description specifically says you should have moderate physical fitness level.
Less ideal if:
- you hate heights and would struggle with cliff-edge feeling at Baltzer Lookout (no fence separation)
- you don’t have grippy shoes and don’t want to buy or borrow the right footwear
- you want a long, ride-all-day endurance challenge (this is half a day, roughly)
The maximum group size is 15, and the service is mobile. That usually keeps things manageable and helps with the quality of the intro.
Quick decision guide: should you book this ride?
Book it if you want an e-bike day that feels guided at the start, clear on navigation, and rewarding in the views department. The blend of safety gear, helmet fit, bike instruction, and a map-based out-and-back route makes it a practical way to experience the Blue Mountains wilderness without getting lost in logistics.
Skip it or rethink it if loose footing is a major worry for you or if you’re uncomfortable with the open cliff-edge feel at Baltzer Lookout. Also, if you don’t want to handle the ID/credit-card requirement, this might add friction.
If you’re willing to wear grippy shoes, follow the safety tips, and ride within your comfort level, this is the kind of Blue Mountains experience that leaves you feeling like you actually used the region well—moving through it, not just driving past it.
FAQ
Is this experience fully self-guided?
Yes. You get an intro, safety gear, and trail information, then you ride using the map and the route plan. The ride is described as self-guided and typically works as an out-and-back route.
Where does the e-bike ride start?
The meeting point is Blackheath NSW 2785, Australia. The ride ends back at the same meeting point.
How long does the ride take?
From hello to goodbye, plan for about 3–4 hours. Riders generally complete the ride in about 3 hours.
What time does the tour run?
The listed start time is 9:00 am. Start and finish times can vary, and you’ll be confirmed the night before with a phone call from Sam.
What e-bikes are used?
The service uses Merida big 7/9 mountain e-bikes with Shimano components, including the motor and battery.
Are helmets provided?
Yes. You’ll be provided a helmet and Sam will ensure it fits correctly for safety.
Are gloves and basic bike gear included?
Glove hire is included. You also get spare bike tube/pump/tyre lever hire.
Do I need to bring pedals?
SPD pedals are not included, but you can hire them on the day for $15.
What should I wear or bring?
Shoes are very important because parts near Blatzers Lookout and Hanging Rock can be loose underfoot and need grip. You’ll also need identification (passport, licence, or acceptable form of ID) and an active credit card on the day.
What happens if the weather is bad?
This experience requires good weather. If it’s canceled due to poor weather, you’ll be offered a different date or a full refund.